Tag: film photography

  • Kalkbruket

    Kalkbruket


    We passed by this abandoned lime kiln on our way back from Åsen, and I had to stop the car. We parked by the small house across the road. We walked around the beautifully-decayed factory and right then, an almost-alternate reality opened in front of our eyes. It was breathtaking.

    Perhaps you don’t know, but I’m fascinated with industrial buildings, especially those that have been deserted. The metal pipes and sheets. The wind through broken windows and the electric silence. The rawness, almost bare.

    An art of some sort; a stillness that moves me and makes me reflect on what surrounds us.

    What inspired you today?

  • My ultimate kanelbullar

    My ultimate kanelbullar

    Tomorrow is the 4th of October. A date that doesn’t go unnoticed in Sweden. Yes, tomorrow is kanelbullens dag [cinnamon roll day].
    I must have felt that this post – which I promised to share with you long before I even knew kanelbullar had their own day – was waiting in my drafts for a reason.

    This is a recipe I first made in Åsen, the summer before last. I kneaded the dough in the evening, as we came back from a day by the lake. And by the time breakfast was ready the next morning, the buns had proofed and were ready to go in the oven for a mid-morning fika.

    Later that day, I realised we’d forgotten my camera charger in Kusmark so I ended up taking some pictures using the film camera Kalle gave me.

    We rushed on the road to Mora – through the forests and the bridge that goes over the lake, through the little stress I’ve come to cherish and the rails by which we always get to see a train pass by – to bring the roll to the only lab we knew of.

    And because it was not fully exposed, I quickly took a few pictures of what was around me. In fact, the one below – of Kalle – is, to this day, one of my favourites.
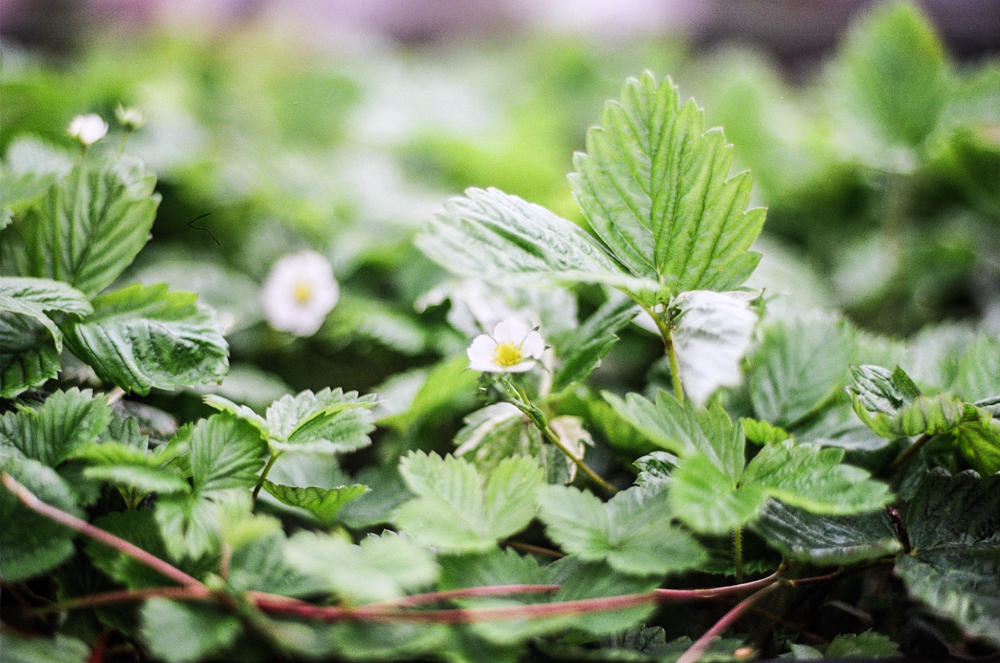
    Yes, it’s not without a certain sense of both love and reserve that I’m proud to tell you that my 79th roll of film has pictures of bullar, one of K., one of the sky, and one of flowers. The dream roll?

    But let go back to that morning. When I rolled the dough and topped it with a thick layer of cinnamon butter. I don’t always say this, but salted butter really does wonder here.
    Yes, that morning, is to be forever remembered. The table covered in a thick layer of white paint. And the blue chairs around it. The spitting sound of the fire in the wood stove. This is where I learnt how to roll kanelbullar.

    A year has passed since then – days made of snow and walk through leafless trees, a spring that only lasted a second and a summer that is now starting to turn into autumn. Many more bullar have been rolled. At home. At the café.

    And while my rolling techniques have definitely improved, the recipe has received only a few tweaks. That’s how much I’m in love with it. And I hope you will be too.

    Kanelbullar, un peu comme des brioches

    I love my bullar to be soft and fluffy, so instead of using a traditional recipe (which I always find slightly dry), I go for a cross between a doughnut and a brioche dough.

    Although I’ve shared a recipe for kanelbullar in the past, these ones are different. They are my favourites. The ones I make at home and freeze into small plastic containers, ready to be thrown into a lunchbox or popped in the microwave for an almost-instant fika. The ones I make everyday at the café too (when I’m not off – and for the first time in a long time, I shall say: YES to the weekends).

    The old ones were of the spur-of-the-moment kind. Made late, during our last night in Sweden the first time we visited. Eaten by Byske river, just a few hours before our flight back to London. They had whole wheat flour and I remember how long it took to develop the gluten by hand.
    I also remember how wonderful it was to unwrap the not-so-neatly folded foil and dip them into a forever-hot cup of kokkaffe.

    Making a sticky dough by hand is always a challenge; it takes time, a good scraper and hands being cleaned every so often. But trust me, I’ve done it many times and it doesn’t only produce beautiful results, it’s also wonderfully relaxing.

    EDIT 5 October

    After a few of you reported butter leakage, I’ve noticed I had missed a modification, which I made a few months ago: I now use a reduced amount of butter in the dough – 130g instead of 200g; a leaner dough absorbs the butter better, but I couldn’t remember why I had reduced it as I love the texture of the buns made with 200g of butter so much!
    Thank you for your feedback! Also, make sure the bullar are proofed until doubled in size before baking them. It takes around 2 hours at 24°C but can take 3-4 hours if the room temperature is colder. Lots of love and sorry for the caramelised cinnamon butter 🙁

    EDIT 6 October

    I’ve tried both batches today, with 130g and 200g butter. While I love the texture of the buns with 200g of butter, they do leak during baking; a quick fix, if you’re after melt-in-your-mouth bullar, is to bake them in muffin paper-cases so you won’t end up with a puddle.
    As for the batch with 130g of butter, they’re a bit lighter and almost no butter leak 🙂 Sending you all my cinnamon-love X

    EDIT 8 December 2016

    After having made this recipe daily for well over a year, I think an update is in order.
    I have modified it slightly, mostly because I make it using 3.2 kg of flour, and that the flour here has a slightly higher absorption power.

    Here is my updated recipe:

    Kanelbullar 2.0

    Kanelbullar, un peu comme des brioches
    Every year, on the 4th of October, Sweden celebrates Kanelbullens dag: Cinnamon Bun Day. It feels like the perfect excuse to revisit one of my favourite recipes. These buns have been with me for over a decade now. The first version I baked in the summer of 2014 was a little more rustic.
    Since then, I’ve spent countless hours calculating baker’s percentages, testing variations and tweaking until I found what felt just right.
    What follows is my current go-to recipe (let’s call it version 2.0), followed by the 1.0 recipe for those who want to see where it all began.
    Author: Fanny Zanotti
    Prep Time1 hour 30 minutes
    Cook Time15 minutes
    Total Time1 day 1 hour 45 minutes
    Makes 14 buns

    Ingredients

    For the dough

    • 600 g flour
    • 75 g caster sugar
    • 18 g fresh yeast
    • 7.5 g sea salt
    • 4 g hand-ground cardamom
    • 225 g whole milk
    • 150 g eggs
    • 190 g unsalted butter

    For the filling

    • 190 g salted butter at room temperature
    • 150 g caster sugar
    • 3 tbsp ground cinnamon

    To top

    • 2 eggs beaten
    • pearl sugar

    For the syrup

    • 75 g caster sugar
    • 75 g water

    Instructions

    • In a large bowl, combine flour, sugar, yeast, salt, and cardamom. Add the eggs and milk. Mix until a dough forms.
    • Knead by hand for around 20 minutes, or in a stand mixer fitted with a dough-hook for about 10 minutes, until smooth, elastic, and just tacky. The dough should stretch into a thin membrane without tearing.
    • Add the butter gradually. By hand, work it in 3–4 additions, smearing and kneading until fully incorporated. In a mixer, add small pieces one by one. The dough will look split at first – keep going until smooth again.
    • Place in a large bowl, cover, and chill. Either proof 1 hour at room temperature, then refrigerate for 2 hours, or refrigerate straight away for at least 8 hours (and up to 24 hours).
    • The next day, line two trays with baking paper. Mix the filling ingredients until smooth.
    • On a lightly floured bench, roll the dough to a 30 × 60 cm rectangle, about 5–6 mm thick. Spread with cinnamon butter. Fold the dough into thirds (like a letter), giving you a rectangle about 30 × 20 cm.
    • Cut into 2 cm strips. Twist and tie each into a knot. Place on trays. Cover loosely and proof until doubled – around 2 hours.
    • Preheat oven to 200°C / fan 180°C. Brush the buns with egg wash, sprinkle with pearl sugar, and bake 12–16 minutes, until golden.
    • For extra shine, brush with hot syrup as soon as they come out of the oven. Cool slightly on a wire rack.

    Glad kanelbullens dag!

    The 1.0 recipe from my 2014 summer:
    For the dough
    530 g strong flour
    70 g caster sugar
    16 g fresh yeast
    10 g sea salt
    1 tsp ground cinnamon
    3 eggs
    (150 g)
    190 g whole milk
    130 g to 200 g (read note/edit above) unsalted butter
    , at room temperature

    For the cinnamon butter
    250 g salted butter, at room temperature
    170 g caster sugar
    3 tbsp ground cinnamon
    1 tsp ground cardamom

    For the topping
    1 egg, beaten, to glaze
    a handful of pearl sugar

    For the syrup
    75 g caster sugar
    75 g water

  • Sugar, acid and pectin content of fruits

    Sugar, acid and pectin content of fruits

    It seems like we’re having a bit of a jam week around here.

    I guess it’s only natural when the world around us blooms in an exponential kind of way. Here we’ve had a rather unusual month of May. Lots of sun. Lots of rain too. And because the temperatures rarely get above 20°C, once they will – perhaps after mid-summer – fruits will suddenly surround us.

    I thought it would be nice to have a table to compare sugar, acid and pectin content of some of these fruits. Of course, those three factors will change depending on the degree of maturity of the fruits or their variety, but it’s a good starting point to adapt your favourite jam recipe for different fruits.

    Should you add more sugar? Less pectin? More acid?
    Hopefully this table here will help in answering your questions.

    How to use the table?

    Let’s take melon for example.

    I currently don’t have a melon jam recipe. I do however have a killer strawberry jam one.
    According to the table, I could make melon jam using my strawberry jam recipe, only I would need to add more citric acid at the end of the cooking process, as melon have an average pH of approximately 6, while strawberries’ pH is closer to 3.4.

    Fruits with high pectin levels and low pH.

    In the case of fruits with high pectin levels and low pH – like lemons, limes, cranberries, blackcurrants, oranges, gooseberries, grapefruits, mandarines or red currants – you probably don’t need to add much acid at all, and certainly don’t need to add extra pectin; as the fruits themselves offer the perfect conditions to form a gel (which for pectin are: sugar, acid, heat).

    A quick note on citrus.

    The flesh of citrus fruits isn’t high in pectin, while the zest and pips are.

    What is pH anyway?

    pH is a unit of acidity/alkalinity. A pH of 7 is considered neutral; above that it’s called alkaline or basic, and below that it’s called acidic.
    It’s a bit of a shortcut, but what we fundamentally care about, here, is that the lower the pH the more acidic a fruit is. As you’ll notice in the table most fruits have an acidic pH, but only those with a pH ranging from 2-3.5 are empirically sharp.

    Sugar, acid and pectin content of selected fruits

    %sugaraverage pHpectin level
    Apple133.5medium
    Apricot94low
    Blackberry84.2medium
    Blackcurrant102.8high
    Blueberry113.2low
    Cherry144low
    Cranberry42.5high
    Fig154.8low
    Gooseberry112.9high
    Grape164medium
    Grapefruit63high
    Guava73.6very low
    Kiwi143.5very low
    Lemon22high
    Lime12high
    Litchi174.8very low
    Mandarin133high
    Mango114very low
    Melon76low
    Orange112.8high
    Passion fruit113low
    Peach93.8very low
    Pear103.8low
    Persimmon145.4high
    Pineapple133.5low
    Plum113.4low
    Raspberry73.4low
    Red currant63.2high
    Rhubarb13.1low
    Strawberry73.4low

    Explore my jam recipes:

  • Cake à la banane rôtie

    Cake à la banane rôtie

    [Roasted banana cake]

    I once read that the universe didn’t need another banana cake. In that case, the universe and I might have to disagree.

    We don’t disagree often though.
    In fact, most of the time, we’re in a symbiotic agreement that all is in its place.

    Let me tell you about a few nights ago.
    It might have been Monday or Tuesday, I don’t know for sure, although I’d think it was Tuesday.

    K. and I took a walk at dusk. With very diffuse clouds above our heads. And right after K. told me they might – perhaps – be northern lights not clouds, the sky turned into a beautiful firework of magnetic fields. Greens and purples. Right above. Reflecting in the snow around us.

    And just like last week, when I saw norrsken for the very first time, I stayed there. Looking up until they melted back into the sky, leaving place to constellations and satellites.

    On our way back, we could still see them in the distance. And as a truck drove past – carrying wood that would become something else – it smelled of walks in the forest. Those of the kind I cherish so much now that the snow is slowly melting, uncovering – everyday a bit more – grass and bushes. Yes, I never want to forget the snow.

    I don’t want to forget this morning either. When I sat in the sun, with a cup of coffee and a slice of banana cake. I was wearing leggings and a thick sweater, oh, and the scarf my mum gave me right before we left France.
    Because, you see, I had bananas on the kitchen counter – the one made of the somewhat retro plywood – ripe and spotted. And we all know it can only mean one thing: banana cake.

    Yes, perhaps the universe doesn’t need another banana cake. But I did.

    Cake à la banane rôtie
    This cake will keep for days, well wrapped in clingfilm. In fact, I think it’s even better a day or two after. In fact, it keeps so well, that I almost always make a double batch to have cake all week long.

    Some of you might want to skip the roasted banana purée if you’re in a hurry, and although I love the combination of roasted and fresh bananas, it will work almost as well if you choose to use only mashed fresh bananas. In this case, simply use three large ones, around 300-320g.
    You could also make a rum glaze or a mascarpone frosting, but I think banana cake is one of the many things that are better eaten naked.

    A few notes on method, the honey, piped butter, and baking temperature:
    I do not let the butter come at room temperature whenever I cream it, as it will soften as you work it. And especially, in this recipe, because we add the warm banana purée which makes the whole softening process much faster.

    The honey in this recipe, because it is an invert sugar, is used to bind with the water contained in the bananas, and make sure the cake will keep moist but not soggy for almost ever.
    The flavour of honey is fairly subtle and complements the banana well.

    As you now know, I’m very fond of this technique to get a neat crack on top of loaf cakes. I always pipe a thin line of soft butter on top of my unbaked loaf, using either a piping bag or even easier a paper cornet (remind me to show you how to fold one).
    When the batter starts to rise, the butter will sink in, creating a neat crack.

    When it comes to loaf cakes, I always like to bake them at high temperature and then reduce to finish the baking. I usually do 5 minutes at 180°C, 10 minutes at 170°C, and 25-30 minutes at 160°C.
    For this banana cake, given how much moisture there is, I’ve found I get better results with 20 minutes at 180°C and then around 30 minutes at 160°C.

    Cake à la banane rôtie

    makes one large loaf cake

    For the roasted banana purée
    2 large bananas, with skin on
    50 g caster sugar

    For the caramelised roasted bananas
    160 g plain flour
    1 1/2 tsp baking powder
    1 tsp sea salt

    180 g butter
    130 g light brown sugar
    50 g creamy honey
    200 g roasted banana purée
    1 banana
    , (approximately 100 g) mashed with a fork
    3 eggs, at room temperature

    10 g butter, at room temperature, to pipe on top of the cake

    Start by making the roasted banana purée.
    Preheat the oven to 180°C and place the bananas – skin-on – on a baking tray lined with baking paper. Prick a few holes into the fruits using a small paring knife and roast for 15 minutes, or until black with juices coming out. Allow to cold down until cold enough to handle.
    In a small pan, cook the sugar over low heat to make a light caramel. While the sugar is cooking, peel the bananas, being careful not to burn your fingers.
    When the caramel is just light brown. Take off the heat and add the bananas. Return to the stove, and cook slowly – stirring frequently to dissolve any bits of caramel that might have seized – until you can see the bottom of the pan as you stir, not unlike jam. Transfer to a bowl and allow to cool down for 15-20 minutes.

    In the meantime, butter and line a 1L loaf tin.
    In a bowl, combine the flour, baking powder and salt. Set aside.
    Place the cubed butter, sugar and honey in a large bowl, and cream for around 3 minutes. Add the banana purée and the mashed banana, and mix for a further minute.
    Add the eggs, one at a time, mixing for a minute after each addition.
    Add the flour and mix until just smooth. Scrape the batter into the prepared loaf tin, pipe a line of soft butter on top of the cake.
    Bake in the preheated oven for 20 minutes, then reduce the temperature to 160°C and bake for another 30 minutes or until a knife inserted in the centre of the cake comes out clean.
    Unmould immediately, placing the cake on its side. Cool down completely.

  • PS. We picked apples and made cider. Oh and an apple cake too!

    PS. We picked apples and made cider. Oh and an apple cake too!

    One morning, we woke up to lights through the wooden blinds barely covering never-ending windows. Coffee got made. And we sat on the steps overlooking the garden. Early signs of autumn, drawn to the earth in the shape of dew that made our feet wet as we walked to the apple tree.

    Apples as white as snow. His dad said they were called Transparentes blanches. And I really wanted to believe him so I proceeded to do so. I picked a few. Held them in my dress. Peeled them and cored them, with a small knife. Sliced them with the very same knife. And layered them with honey. I whisked eggs into butter and sugar. Eggs paler than the milky-way above our heads the night before. And added wholewheat flour and cinnamon just so. The cake went into the oven and we went fly-fishing by the river. We saw grown-up salmons jump, and tiny frogs too. I was taught how to say liten groda and it meant so much more. We picked blueberries, but you already know that.

    So yes, we picked apples and made cider. Cider for in a few months. And I made an apple cake. For dinner that night. It came with vanilla ice-cream from a tub. And I remember how we cut into it with a knife.

  • Éclairs au chocolat

    Éclairs au chocolat

    [Chocolate eclairs]

    When trees are shaped like hearts; and breakfast means just-brewed coffee slash bike ride slash jonchée eaten as soon as I’ve taken my gum boots off.

    And we run barefoot in fields of frost. And the grass glows to the moonlight in a way only gems can. With la grande ourse [the great bear] and a feral cat as our only companions for this aimless journey.

    We breathe the cold air and feel alive. We kiss and feel warmer. It’s the very instant that matters.

    Yes, at times, it’s ok to loose track. Of time, of purpose…
    Days are long. And nights too.

    Crossing off to-dos like there is no tomorrow, because, after all, holidays are made of no-tomorrows.

    Today, we made éclairs, à la Fauchon. It was fun, and messy. The kitchen ended up looking à la Fauchon too. Stripped with white and black fondants.

    It’s fine, really. It is.

    We licked our fingers. And ate an éclair, of the à la minute kind. Then scrubbed the counter until it no longer felt sticky. Just our mouths did. And that is a good sign, by all accounts.

    Éclairs au chocolat
    Inspired by Fauchon.

    If you can make choux paste and crème pâtissière, then it really all gets down to glazing an éclair with fondant, then piping straight lines of a coloured fondant. This can be made with either a piping bag or a paper cornet (the latter being my favourite, some things will never change, trust me).

    The only trick to know is to make sure both fondant have the same temperature and texture.
    For the chocolate fondant, I simply added a bit of cacao powder until it looked dark enough. Then mixed in 30°B syrup until the texture seemed just right.

    I guess it’s a bit of a trial and error at first. But it’s ok. We love sticky fingers around here.

    And since I’m at it, fondant is a kind of crystallised sugar that can be found in fancy shops. In case it’s nowhere to be found, try mixing icing sugar and a tiny bit of water…

    Both the choux paste and crème pâtissière can be made in advance. Since the paste is frozen, you can make it up to a week before. And the cream can stay in the fridge for a couple of days.
    However, once the éclairs are filled, they’re best eaten in the day.

    Éclairs au chocolat

    makes 12 éclairs
    for the choux paste
    one recipe of choux paste
    one egg
    , for eggwash
    butter, to grease the baking tray

    Make the choux paste according to the recipe.
    Pipe it onto a baking tray lined with baking paper into logs using a 15mm nozzle; then freeze. Cut into 13cm-long éclairs and arrange on a buttered tray. And bake until golden brown (tips on how to bake choux paste here).

    For the crème pâtissière

    250g milk
    100g cream
    2 egg yolks
    30g caster sugar
    15g cornflour
    100g dark chocolate

    Bring the milk and cream to the boil. In a bowl, mix the egg yolks with the sugar and cornflour. Pour the boiling liquids over the yolks, whisking as you go. Then place back into the pan and cook – whisking at all times – until boiling.
    Transfer to a bowl and add the chocolate. Handblend and clingfilm to the touch. Chill.

    Using a small nozzle, fill the eclairs. And set aside.

    For the glaze
    fondant
    cacao powder
    30°B syrup
    (100g caster sugar + 100g water, brought to the boil, then chilled)

    Melt the fondant over a bain-marie or in the microwave. Divide into two heatproof bowls. Add cacao powder to colour one of the batches into a dark brown fondant.

    Reheat both fondant over a bain-marie or in the microwave, until it reaches 30-35°C. Adding a little syrup to make it runny enough. Then using a small spatula or your finger, glaze the top of the éclair.
    Immediately pipe straight lines of dark fondant, making sure the tip of your bag or cornet is cut small enough (perhaps 2mm, the fondant will spread). Then run your finger along the éclair to clean up it sides and twirl the end of the piped lines.

    Repeat with the remaining éclairs. They will keep in the fridge overnight, although they’re best eaten on the same day.

  • Chewy flapjacks

    Chewy flapjacks

    I started collecting objects, to make up for memories I forgot. A blue pool ball, a broken cigarette, a plastic table number.

    I read words. Most of the time, at night. Yes, all it took was a few words. Perhaps, a bad google translation too. In fact, some words don’t translate well into French. But it was cute. And it made me miss him even though I thought he was part of those long gone memories.

    And when the world we both knew started to fold itself and disappear, I employed magical thinking. Of the good kind. Possibly involving flapjacks. Because, let’s face it, they seem to be a bit of a mystery around here these days.
    Some people want them crunchy. Most go for chewy. A pinch of flour or not? And what about condensed milk…

    Chewy flapjacks

    Those are, by no means, the best flapjacks ever. There are in my own world. But then, I wasn’t lucky enough to be brought up on crumpets and marmalade, and had to make the most of croissants and confiture.

    They are those flapjacks with a thin crunchy crust and soft chewy – almost – fudgy crumb. If you’re after the crunchiest kind, I would suggest to use a larger pan (so the overall thickness is thinner) and bake them at a slightly higher temperature. Perhaps, 190°C.
    Here, I bake them at 180°C. But please, as with all baking, keep in mind that I have a diplodocus of an oven. Non fan-assisted. And with all the heat coming from two gas burners at the bottom. If you have a fan oven, it’s good to reduce the temperature by 20°C (and open a bottle of champagne).

    There are two important steps – if they can even be called this way. The first is to line the pan all the way to the top with baking paper. And the second is not to bring the sugar/butter mixture to the boil before adding the oats. You just want the butter and light brown sugar to be happily melted.

    Chewy flapjacks

    makes 10-12

    200g condensed milk
    150g butter
    85g light brown sugar
    60g golden syrup
    5g maldon sea salt
    320g oats

    Preheat the oven to 180°C/fan 160°C, and line a 20x20cm baking tin with baking paper. I like to butter the pan first so the paper nicely sticks to it, without any crease.

    In a large pan, place the condensed milk, butter, light brown sugar, golden syrup and salt, and cook over slow heat until the butter has dissolved.

    Mix in the oats until nicely coated. Spread into the lined tin, pressing down with the back of a spoon to chase any air. Bake for 18-20 minutes, or until the edges just start to brown.

    Allow to cool, then slice into rectangles – trimming the edges, as you do so – with a sharp knife.

  • Le fondant au chocolat

    Le fondant au chocolat

    [The ultimate chocolate fondant]

    In London, we’ve had winter in July. Air damp with rain. Kitchens warm with soup on the stove. Oven smelling like chocolate cake.

    And now, in the south of France, we’re having summer in September. Walks through the markets. Sirops d’orgeat at the terrace of the village café. Afternoons at the beach. Ice-cream, in a cone, please. Flip-flops at the feet. Deep-fried is a must, especially when it involves fleurs de courgettes. Watermelon; full-stop.

    It seems that whenever I come down here it’s summer. A summer of the out-of-season kind.

    It also seems that whenever I’m down here, I always return to the same cake. A cake of the homecoming kind.

    It certainly is my go-to. Because, let’s be honest, we all need one.

    One we make on Mondays. One we slice when still warm and slightly runny for a late afternoon indulgence. One we have for breakfast – the day after – cold from the fridge and dipped into the latte we overlooked as we were flipping through the pages of the newspaper. One we finish on Wednesdays after a dinner made of crusty baguette with a side of sliced tomatoes in their juices; perhaps with a scoop of yoghurt ice-cream.

    This cake is dark and dense. The very definition of a fondant.

    And since we’re at it, I shall let you know that what we – French – call fondant is somehow different to the fondants I’ve been known to bake à la minute for the restaurant.
    In fact, if you’re thinking about small little cakes with a melted chocolate centre, we call them coulants in good old France.

    So please, mind your French, will you 😉

    Fondant au chocolat

    Fondant au chocolat
    Adapted from Pascal Lac.

    I’ve told you about this cake before. It is, as I’ve mentioned above, a keeper. If you’re after a moist chocolate cake, then this is the one.

    Plus, it’s damn easy to make. Just chocolate, butter, eggs, sugar, and flour.
    Oh yes, ok, eight eggs and four hundred grams of sugar. Just forget about this and bake it in a 28cm pan for thinner wedges.

    It is worth it!

    When it comes to the chocolate, I like to use a slightly bitter, most possibly 70%. And I have to admit Valrhona Guanaja is especially great for cakes of all kinds.

    The only tricky – and when I say tricky, I mean very merely – step is to bring the eggs and sugar mixture to room temperature-ish over the heat.
    You can either do it straight over the gas, making sure to mix at all time while turning the bowl to ensure heat distribution. Or do it over a water-bath (which should not stop you from mixing and turning the bowl!).

    This step is done, as we say in French, to casser le froid [break the coldness]. And it will incorporate a little air in the eggs.

    Fondant au chocolat

    Makes one 24 to 28cm cake.

    200g dark chocolate
    240g butter
    8 eggs

    400g sugar
    130g flour

    Preheat the oven to 170°C, and generously butter a 24 to 28 cm springform pan.

    In a bowl, melt the chocolate and butter.

    In a heatproof bowl, mix the eggs and sugar – using a whisk – and place over medium heat (or as said above, on a water bath). Keep on mixing until not cold anymore. It shouldn’t be hot either.
    Pour the chocolate over the egg mixture, and mix to homogenise. Sprinkle the flour over and using a rubber spatula, gently incorporate it until just smooth.

    Pour the batter into the prepared tin and bake for 30 to 40 minutes (if you’re using a smaller tin) until just set.

  • Cornbread, comme à Caravan

    Cornbread, comme à Caravan

    [Cornbread, just like at Caravan]

    Sometimes, all I want is to put my warmest boots on, and escape to a place outside of time. I would drive there for hours. To the sound of wind and the smell of rain through the open windows.

    I would wake up too early in the morning. And have a coffee; or two. With a side of freshly-churned butter and a piece of toast. It would be cold. And foggy. Perhaps so much I wouldn’t be able to see the coast.

    I would spend my days at a small bakery. Or on a farm. And at night, I would leave the curtains open to watch the stars.

    Cake au maïs, comme à Caravan
    Adapted from Miles Kirby.

    As soon as I came home from brunch Caravan, I knew that the cornbread we’d just had was bound to happen again in my kitchen. And after a quick search, I was lucky enough to find the recipe. And a simple one too.

    In less than 10 minutes, you can have a cornbread in the oven. Which makes it even more perfect for breakfast or brunch.

    At Caravan, it was served with a chipotle butter, but I went for the easy way and just served it with a knob of butter topped with freshly-sliced red chili.
    Make sure you have a wedge of lime ready!

    Cornbread, comme à Caravan

    Makes one loaf cake.

    400g milk
    3 eggs
    60g butter
    , melted
    250g corn kernels (from approx. 2 corn cobs)
    a bunch of spring onions, finely sliced
    170g polenta
    60g bread flour
    1 tbsp baking powder
    1 tbsp caster sugar
    1 tbsp flaky sea salt

    butter, chili peppers, limes, coriander; extra, to serve

    Preheat the oven to 180˚C and generously butter a loaf tin.
    In a bowl, mix the mix the milk, eggs, and melted butter. In another bowl, combine the polenta, flour, salt, baking powder, and sugar. Add the wet ingredients and mix until smooth. Add the corn kernels and the sliced spring onions.

    Transfer to the prepared loaf tin and bake for 20 to 30 minutes. Or until golden brown and the tip of a knife inserted in the centre comes out clean.
    Unmould and allow to cool for a few minutes before slicing into fat slices, using a serrated knife.

    Serve – toasted opr not – with butter and sliced chili. With a side of limes and perhaps a few sprigs of coriander.

  • Five-minute brioche

    Five-minute brioche


    When I mentioned the five-minute brioche, I forgot to say it’s more of a five-minute and five-day brioche.

    Five days where the blossoms turned into snow. Five days where I got less sleep than what a normal night means to you. Five days where everytime I came home, I opened the fridge to imagine that bubbly dough turn into brioche.

    And then on the night before the fifth day, I set my alarm to eight am; two hours later than a day on. Still dizzy from a sleep overdose, I walked to the kitchen. Fleurer le marbre [sprinkle the marble with flour]. Couper la pate [cut the dough]. Bouler [make balls]. Faire pointer [proof]. Et se recoucher [and go back to bed].

    This, my friends, is the recipe for happiness. Especially, if I then braid my hair and spend the day with someone I love.

    A couple of hours later, we slowly emerged from that broken night – or more accurately, morning nap; a concept that I should put to practice more often.

    The loaf went in the oven. And then got sliced, topped with the strawberry jam he made last week – with the somewhat bland berries I was a little too excited with at the market – and then eaten in bed, with the necessary dose of good tunes and the occasional sun peaking through the window.

    It felt like a Sunday. With all the trimmings, bar the messy kitchen. And, no matter how much I love to get my hands dirty by kneading the hell out of a sticky dough until it becomes smooth, it seemed appropriate to take a shortcut this time.

    Even more so that this brioche proved the die-hard French that I am wrong.

    First came Dan. And his focaccia. Almost no-knead. And almost more delicious than any bread I’ve ever tasted. Then came the no-knead bread that got everyone crazy. And now, Zoë.

    So as much as it hurts me to say it, it is possible to make brioche in a matter of seconds. In one bowl. With one wooden spoon.

    Brioche en cinq minutes
    Adapted from Zoë François and Jeff Hertzberg’s Five minute bread.

    I once read somewhere that in order to make a good brioche you need time. I think it was actually mentioned as part of the ingredient list, which I thought was clever as I remembered the hours spent kneading – by hand – a three-kg batch at school.

    And while I love the process, I must admit it does feel good to – every now and then – take the easy option. It says five minutes. But it really is less than that.
    Butter gets melted. And mixed with water, eggs, honey, and salt. No sugar. Just honey, which being inverted sugar – kind of natural trimoline – helps the brioche to stay moist after baking.
    Flour and yeast get incorporated. And the dough is left outside to proof. Only to be, later, chilled; for a day or two. Or in my case, five.

    As a side-note, I do think this recipe could take more butter. Possibly twice more. Possibly because I’m French. Possibly something I will try and report. Which will also allow me to show you how to bouler une pâte [shape the dough into a ball], because – let’s be honest – I’m not sure it translate into words.

    EDIT 24/07/2011: We made this again, but with 500g of butter instead of the 350g written below. It worked and was, as expected, delicious!

    Five-minute brioche

    makes four loaves

    350g-500g (read EDIT above) butter, melted and cooled down
    350g water
    20g salt
    8 eggs
    170g clear honey
    1kg strong flour
    15g instant yeast

    one egg, beaten, for the eggwash

    In a bowl, combine the melted butter, water, salt, eggs, and honey. Add the flour and yeast. And mix using a wooden spoon until smooth.

    Cover the bowl with a cloth and allow to rest at room temperature for a little over 2h (or feel bad-ass and stick it in a turned-off microwave – make sure you read the note above beforehand though).

    Transfer the cloth-covered bowl to the fridge and chilled for at least 24h or up to five days.

    On the day you’re ready to bake, generously butter a loaf tin and cut 450g off your dough. Then using a scraper – or a knife – divide into four bits. Have some flour handy and gently pat each piece into it. Putting the flour side up – and sticky side down – shape it into a ball using the palm of one of your hands.

    Place the four balls into the prepared tin and allow to proof for 1h30.

    Preheat the oven to 190°C. Brush the top of the dough with the eggwash and bake for 40 to 50min, or until golden brown. Unmould and allow to cool on a wire rack, or not.